Creating a workshop in my garage
Background
I’ve always wanted a small woodshop.
With both of my parents in theatre I spent a lot of my childhood in the shop they used for building sets. When we bought our first house I purchased a couple of woodworking tools, but my work area was in the garage which was shared with our cars. This made it hard to work on bigger projects and sawdust was always getting all over everything.
Our second house had a three car garage which meant I finally had a dedicated space, but sawdust control was still an issue. Plus, it rains a lot where I live so dampness control was also an issue, especially as we went in and out of the garage.
When the pandemic hit I suddenly found myself in desperate need of a project and decided to see if I could construct a wall between the main garage and the third bay to create a small, dedicated woodshop.
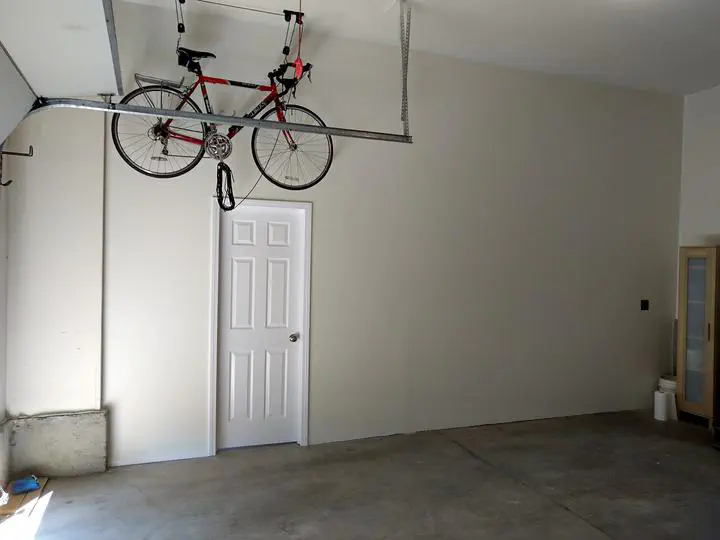
This is the before picture. Since the third bay was not isolated it often became just a dumping ground for things.

My first step was to take all the sheetrock off the post. Once I did that I was pretty much committed to the project. I knew I wanted to use the post to divide the wall in half, structurally at least, and I figured it would be better to work on the smaller half first, even though it was going to have a door in it which, at the time, I had no idea how to actually do.
But first, I had to put in the header and footer boards to attach the vertical 2x4s to.

In order to nail into the concrete I bought a hammer drill to drill anchor holes. This worked, but for the other half of the wall I borrowed a powder actuated nail gun from a friend of mine, which basically uses a 22 cartridge to shoot a nail into the concrete. Very loud, but much faster.


Once the header and footer were attached I started putting in the vertical 2x4s. I read up a lot on how to build a door frame with a king stud, jack stud and header plate.

Satisfied with the framing I went on to do the other side, using a laser level to make sure the wall was straight.

For this side I wasn’t as lucky with the ceiling beams and they were parallel with the wall instead of perpendicular, as they had been for the first section. This meant that I had to climb up in the attic space and attach cross beams first before I could then attach the header boards.


Insulation
Initially I was not going to add insulation as I hate working with it. If you don’t cover up enough you can get thousands of tiny glass slivers that seem to take weeks to work their way out. But in the end I decided to add it, mostly because I was going to be running some power tools and wanted the extra sound insulation.

I also added in some 20amp outlets and ran all the wiring, but ended up hiring an electrician to actually hook it into my electrical panel. I’ve added breakers to my panel before, but the whole thing scares the hell out of me and is not something I wanted to do again.
I also installed a 240v 50amp circuit on the garage side for a future electric car plug in, and a 240v 30amp circuit on the shop side for my table saw.

Sheetrock
I debated about installing the sheetrock myself or hiring out. Although I’ve done some small patch repairs, I haven’t actually done a full install before so this could be an opportunity to learn. That said, sheetrock is heavy and although I probably could have rigged up something to help me install it, it is much faster as a two person job. So in the end I just hired out for this part as well. We had temporary access to a truck so I was able to pick up the sheets myself and then two pros came in and got the whole thing installed and mudded in less than a week.


Painting
I did decide to paint it myself so I started with primer and was surprised at how much a new wall soaks in the primer. I went through way more than I was expecting.
I also opted to not add any texture to the wall as most of the walls in the garage were already pretty flat and I would have had to hire out for the texture as well as I’ve heard it’s a trick to get right the first time.

Door
I had never hung a door before, but it turned out easier than I was expecting. In the three years since I installed this I still haven’t had any issues with expansion or jamming.

Moulding
Next I attached most of the moulding. After going around the door I got busy with other projects and still, as of this writing, have not entirely finished the moulding. Seeing as how we are now modernizing the moulding in our house I may just wait and replace this with the new moulding as well.

Lights
Adding lights was the last step. There was already a plug in the ceiling where a garage door opener could plug in, so I bought some led strip lights and plugged them in with a remote on/off switch. (Initially I was thinking I might actually wire up a switch, but in the end this was easier and cheaper.)
The led lights are fantastic and really do a great job of lighting up the woodshop. I have since pinned the wires to the ceiling so they are no longer dangling down like you see here.

Final thoughts
This was a fantastic project which I both super enjoyed working on, and also left me with a very usable space for a woodshop. I still have a lot of work to do on organizing and building out the actual shop, but having a dedicated space has been a dream come true.
Joshua Gerth
Engineering Manager
Distributed Systems Engineer
Systems Architect
My research interests include big data, language parsing and ray tracing.